Getting Started with Obelisk (Rust / WASM)
This guide walks you through building a durable application with Obelisk using Rust compiled to WebAssembly and run in Wasmtime. You'll implement an activity, serial and parallel workflows, and a webhook endpoint in Rust, then see crash recovery in action.
If you prefer to skip the build step, see Getting Started (JavaScript) — it uses the same demo-tutorial but with JS files that run directly without compilation.
1. Install Obelisk
curl -L --tlsv1.2 -sSf https://raw.githubusercontent.com/obeli-sk/obelisk/main/download.sh | bashSee the Installation page for Docker, Nix, prebuilt binaries, and other options.
2. Install Rust
Obelisk WASM components are compiled with Rust. Install Rust via rustup:
curl --proto '=https' --tlsv1.2 -sSf https://sh.rustup.rs | shAdd the required WASM targets:
rustup target add wasm32-wasip2 wasm32-unknown-unknown3. Clone the Tutorial
git clone https://github.com/obeli-sk/demo-tutorial.git
cd demo-tutorial/rust
The rust/ directory contains three Cargo crates and a deployment.toml.
4. The Components
Activity
activity/activity-sleepy/src/lib.rs — the unit of side-effectful work. Activities are retried
automatically on failure or timeout, and must be idempotent.
use exports::tutorial::activity::activity_sleepy::Guest;
use wit_bindgen::generate;

generate!({ generate_all });
struct Component;
export!(Component);

impl Guest for Component {
    fn step(idx: u64, sleep_millis: u64) -> Result<u64, ()> {
        println!("Step {idx} started");
        std::thread::sleep(std::time::Duration::from_millis(sleep_millis));
        println!("Step {idx} completed");
        Ok(idx)
    }
}
The WIT interface (wit/tutorial_activity/tutorial_activity.wit) declares the function signature:
package tutorial:activity;

interface activity-sleepy {
    step: func(idx: u64, sleep-millis: u64) -> result<u64>;
}
Return types must be fallible (result) — Obelisk uses this to drive retries and timeouts. See
Rust Components for the WIT world and
bindgen details.
Workflows
workflow/workflow-tutorial/src/lib.rs defines two functions.
Serial — runs 10 steps in sequence with a persistent 1-second sleep between each:
fn serial() -> Result<u64, ()> {
    let mut acc = 0;
    for i in 0..10 {
        workflow_support::sleep(ScheduleAt::In(Duration::Seconds(1)), None)?;
        let result = step(i, i * 200)?;
        acc += result;
        log::info(&format!("step({i})={result}"));
    }
    Ok(acc)
}
Key concepts:
workflow_support::sleepis a persistent sleep — its state is saved to the execution log. If the server crashes mid-sleep and restarts, the sleep resumes where it left off.step(i, i * 200)calls the activity function directly. The call and its result are recorded in the execution log; on replay the activity is not re-executed.
Parallel — submits all 10 steps concurrently using join sets, then awaits results:
fn parallel() -> Result<u64, ()> {
    let mut handles = Vec::new();
    for i in 0..10u64 {
        let join_set = workflow_support::join_set_create();
        step_submit(&join_set, i, i * 200);  // non-blocking submit
        handles.push((i, join_set));
    }
    let mut acc = 0;
    for (i, join_set) in handles {
        let result = step_await_next(&join_set).unwrap();  // returns the child result directly
        acc = 10 * acc + result?;
        workflow_support::sleep(ScheduleAt::In(Duration::Milliseconds(300)), None)?;
    }
    Ok(acc)
}
step_submit and step_await_next are
extension functions automatically generated by
Obelisk from the activity's WIT interface.
Webhook Endpoint
webhook/webhook-tutorial/src/lib.rs — serves HTTP and triggers workflows:
#[wstd::http_server]
async fn main(request: Request<Body>) -> Result<Response<Body>, Error> {
    let path = request.uri().path_and_query().unwrap().as_str();
    let response = match path {
        "/serial" => {
            let acc = workflow::serial().unwrap();
            Response::builder().body(Body::from(format!("serial workflow completed: {acc}")))
        }
        "/parallel" => {
            let acc = workflow::parallel().unwrap();
            Response::builder().body(Body::from(format!("parallel workflow completed: {acc}")))
        }
        _ => Response::builder()
            .status(StatusCode::NOT_FOUND)
            .body(Body::from("not found")),
    }?;
    Ok(response)
}
Configuration
deployment.toml wires the compiled WASM files together:
[[activity_wasm]]
name = "activity_sleepy"
location = "target/wasm32-wasip2/release/activity_sleepy.wasm"
exec.lock_expiry.seconds = 10

[[workflow_wasm]]
name = "workflow_tutorial"
location = "target/wasm32-unknown-unknown/workflow/workflow_tutorial.wasm"

[[webhook_endpoint_wasm]]
name = "webhook_tutorial"
location = "target/wasm32-wasip2/webhook/webhook_tutorial.wasm"
routes = ["/*"]
See Deployment Configuration for all options.
5. Build and Run
Build all three components:
(cd activity/activity-sleepy && cargo build --release --target wasm32-wasip2)
(cd workflow/workflow-tutorial && cargo build --profile workflow --target wasm32-unknown-unknown)
(cd webhook/webhook-tutorial && cargo build --profile webhook --target wasm32-wasip2)
Start the server:
obelisk server run --app-config app.toml --deployment deployment.tomlThree endpoints start automatically:
- Web UI at http://localhost:8080
- Webhook server at http://localhost:9090
- API at http://localhost:5005
Trigger the serial workflow:
curl http://localhost:9090/serialAfter ~20 seconds (10 steps × 1 s sleep each):
serial workflow completed: 45Trigger the parallel workflow — all steps run concurrently, finishes in a few seconds:
curl http://localhost:9090/parallelparallel workflow completed: 1234567896. Inspect Executions
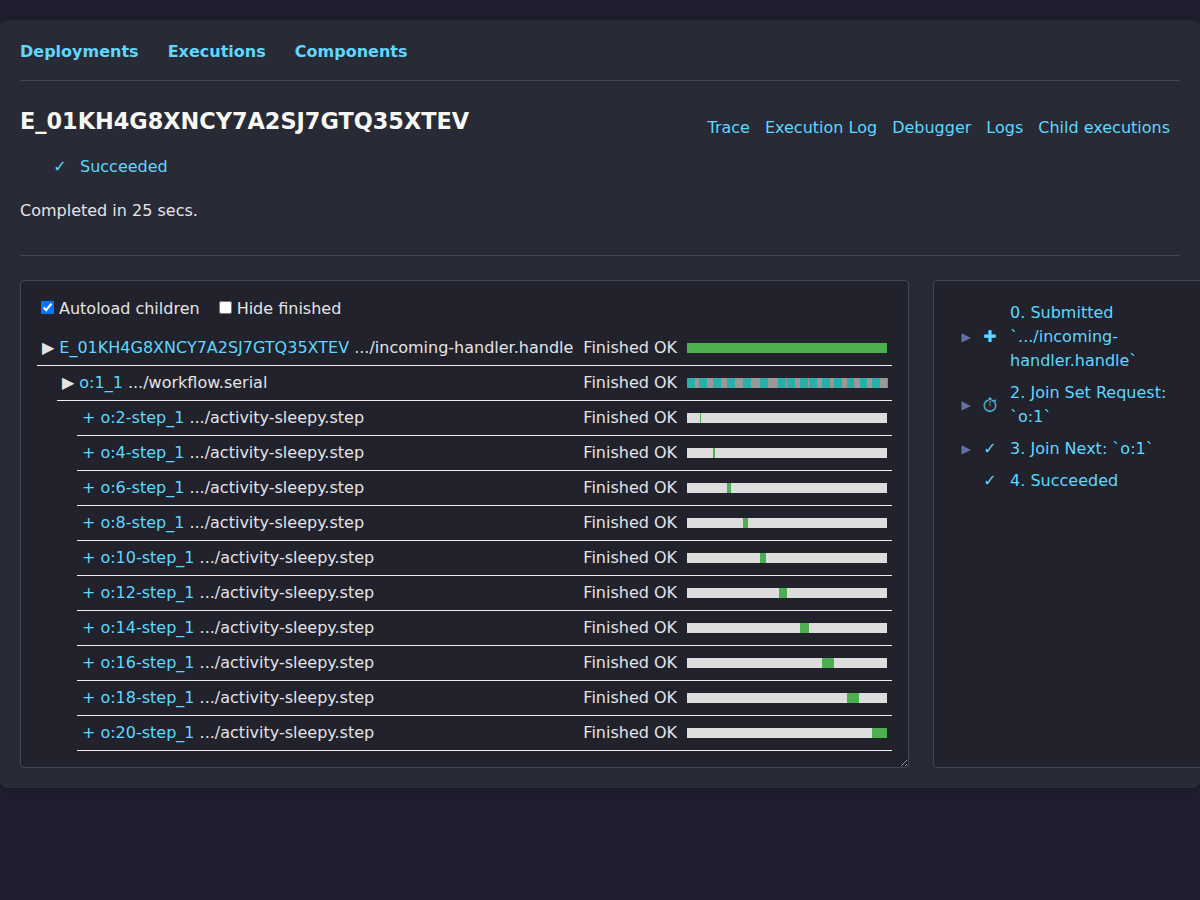
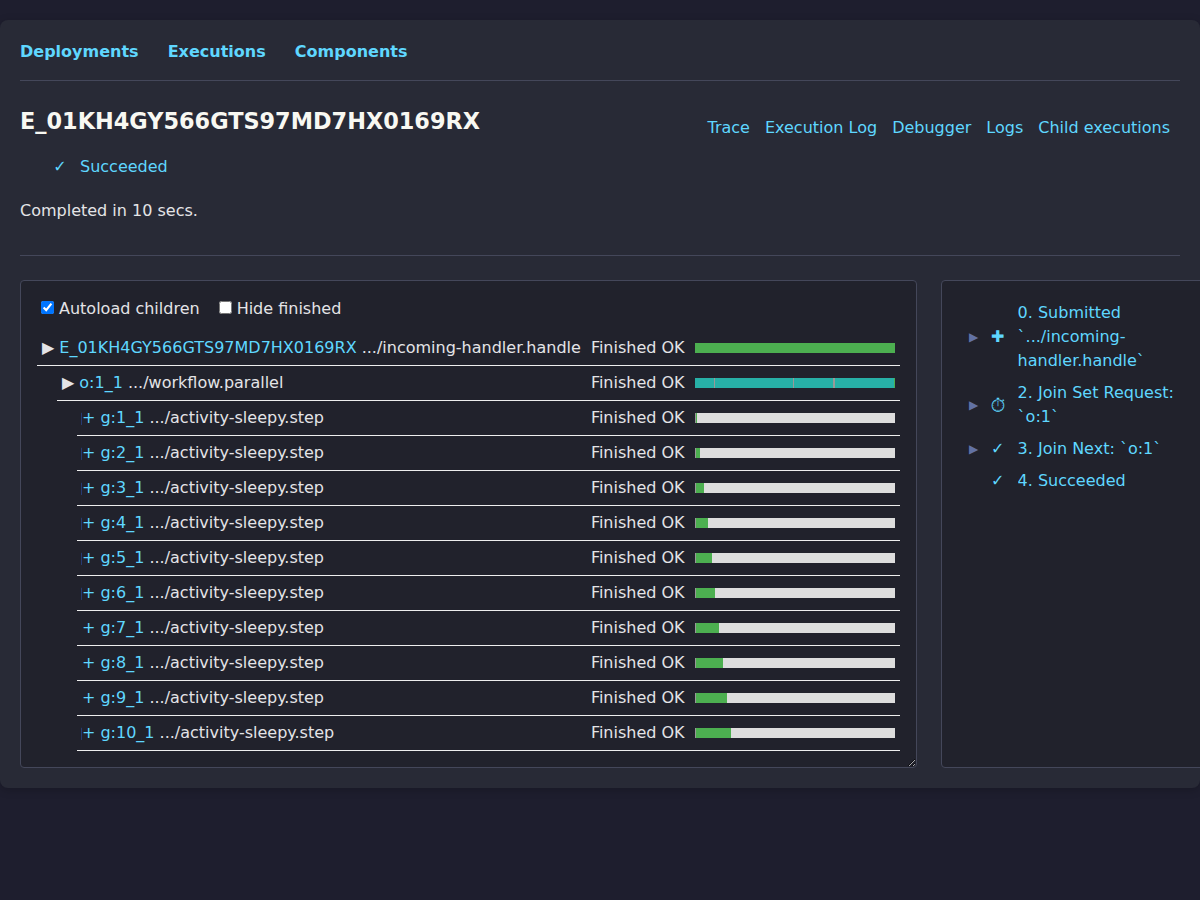
The Web UI at http://localhost:8080 provides a visual trace. Click an execution and enable Autoload children to see the full hierarchy of webhook → workflow → activities.
Serial workflow — steps run one at a time:
Parallel workflow — all steps run concurrently:
Via the API. The API port (5005) requires a bearer token, printed to the console on startup;
export it first (or start the server with --no-auth for a throwaway tutorial). See
Authentication.
export OBELISK_API_TOKEN=<token printed on server startup>

# List top-level executions
curl -s "http://localhost:5005/v1/executions" -H 'Accept: text/plain' \
  -H "Authorization: Bearer $OBELISK_API_TOKEN"

# Include child executions (workflows + activities)
curl -s "http://localhost:5005/v1/executions?show_derived=true&ffqn_prefix=tutorial" \
  -H 'Accept: text/plain' -H "Authorization: Bearer $OBELISK_API_TOKEN"
Fetch logs for a specific execution:
EXECUTION_ID=E_01...
curl -s "http://localhost:5005/v1/executions/${EXECUTION_ID}/logs" -H 'Accept: text/plain' \
  -H "Authorization: Bearer $OBELISK_API_TOKEN"
7. Crash Recovery
Start the serial workflow, then kill the server while it is running:
# terminal 1
curl http://localhost:9090/serial

# terminal 2 — kill mid-execution
kill $(pgrep obelisk)
The curl request fails — but the workflow state is safely persisted. Restart the server:
obelisk server run --app-config app.tomlNo --deployment flag needed on restart: Obelisk persists the full deployment configuration in the
database on first run. It resumes the workflow from its last completed step. Already-completed
activities are not re-executed.
This is durable execution: your workflows survive server crashes, restarts, and deployments without losing progress or duplicating work.
Next Steps
-
JS alternative: Getting Started (JavaScript) — same tutorial with zero build step required.
-
Understand Rust components: Rust Components covers WIT worlds,
wit-bindgensetup, andcargo generatetemplates. -
WIT types and JSON encoding: WIT Basics — primitive and compound types, function syntax, and how values map to JSON.
-
Learn the concepts: Join Sets, Extensions, Activities
-
Start a new project: Adapt the Rust implementation in demo-tutorial, or ask a coding agent to generate the WIT and Cargo setup for your component.
-
Explore a real-world example: The Stargazers demo uses a GitHub webhook, OpenAI, and a database to process GitHub star events with a multi-step workflow.
-
Learn the CLI: CLI reference covers submitting executions, inspecting state, and managing components.