Getting Started with Obelisk
This guide walks you through building a durable application with Obelisk — a workflow engine that automatically recovers your program from failures. You'll create an activity, a workflow, and a webhook endpoint, then see crash recovery in action.
1. Setting Up
Install Obelisk
Download the latest release:
curl -L --tlsv1.2 -sSf https://raw.githubusercontent.com/obeli-sk/obelisk/main/download.sh | bashSee the Installation page for Docker, Nix, cargo-binstall, and other options.
Install Rust
Obelisk components are WebAssembly modules. Rust has first-class support for compiling to WASM. Install Rust via rustup:
curl --proto '=https' --tlsv1.2 -sSf https://sh.rustup.rs | shClone the Tutorial
git clone https://github.com/obeli-sk/demo-tutorial.git
cd demo-tutorial
2. Activities
Activities are the building blocks of work — individual functions that interact with the outside world (call APIs, write files, sleep). Obelisk runs each activity in a WASM sandbox and automatically retries on failure.
Defining the Interface
Every component in Obelisk starts with a
WIT interface definition. Here's the
activity interface in activity/activity-sleepy/wit/tutorial_activity/tutorial_activity.wit:
package tutorial:activity;

interface activity-sleepy {
    step: func(idx: u64, sleep-millis: u64) -> result<u64>;
}
This declares a single function step that takes an index and a sleep duration, and returns a
result. The return type must be fallible (result) — Obelisk needs this to handle retries and
timeouts.
Implementing the Activity
The Rust implementation in activity/activity-sleepy/src/lib.rs:
use exports::tutorial::activity::activity_sleepy::Guest;
use std::time::Duration;
use wit_bindgen::generate;

generate!({ generate_all });
struct Component;
export!(Component);

impl Guest for Component {
    fn step(idx: u64, sleep_millis: u64) -> Result<u64, ()> {
        println!("Step {idx} started");
        std::thread::sleep(Duration::from_millis(sleep_millis));
        println!("Step {idx} creating file");
        let path = format!("file-{idx}.txt");
        std::fs::File::create(path)
            .inspect_err(|err| eprintln!("{err:?}"))
            .map_err(|_| ())?;
        println!("Step {idx} completed");
        Ok(idx)
    }
}
This activity sleeps for a given duration and creates a file — simulating real-world side effects. Because it runs inside a WASM sandbox, file access requires explicit configuration.
3. Workflows
Workflows orchestrate activities. They must be deterministic — given the same inputs and event history, they always produce the same sequence of operations. This is what enables Obelisk to recover workflows from crashes by replaying their execution log.
Serial Workflow
The workflow in workflow/workflow-tutorial/src/lib.rs defines two functions. First, a serial
workflow that runs steps one at a time with persistent sleeps:
fn serial() -> Result<u64, ()> {
    log::info("serial started");
    let mut acc = 0;
    for i in 0..10 {
        log::info("Persistent sleep started");
        workflow_support::sleep(ScheduleAt::In(Duration::Seconds(1)))?;
        log::info("Persistent sleep finished");
        let result = step(i, i * 200)
            .inspect_err(|_| log::error("step timed out"))?;
        acc += result;
        log::info(&format!("step({i})={result}"));
    }
    log::info("serial completed");
    Ok(acc)
}
Key concepts:
workflow_support::sleepis a persistent sleep — its state is saved to the execution log. If the server crashes during the sleep and restarts, the sleep resumes from where it left off instead of starting over.step(i, i * 200)calls the activity function directly. Obelisk records the call and its result in the execution log.
Parallel Workflow
The second function runs all steps concurrently using join sets:
fn parallel() -> Result<u64, ()> {
    log::info("parallel started");
    let max_iterations = 10;
    let mut handles = Vec::new();
    for i in 0..max_iterations {
        let join_set = workflow_support::join_set_create();
        step_submit(&join_set, i, i * 200);
        handles.push((i, join_set));
    }
    log::info("parallel submitted all child executions");
    let mut acc = 0;
    for (i, join_set) in handles {
        let (_execution_id, result) =
            step_await_next(&join_set).expect("every join set has 1 execution");
        let result = result
            .inspect_err(|_| log::error("step timed out"))?;
        acc = 10 * acc + result;
        log::info(&format!("step({i})={result}, acc={acc}"));
        workflow_support::sleep(ScheduleAt::In(Duration::Milliseconds(300)))?;
    }
    log::info(&format!("parallel completed: {acc}"));
    Ok(acc)
}
Notice the imports step_submit and step_await_next — these are
extension functions automatically generated
by Obelisk from the activity interface. They let you submit activities to a join set without
blocking, then await their results later.
4. Webhook Endpoint
A webhook endpoint exposes your workflows and activities over HTTP. The implementation in
webhook/webhook-tutorial/src/lib.rs:
#[wstd::http_server]
async fn main(request: Request<Body>) -> Result<Response<Body>, Error> {
    let path = request.uri().path_and_query().unwrap().as_str();
    let response = match path {
        "/serial" => {
            let acc = workflow::serial().unwrap();
            Response::builder()
                .body(Body::from(format!("serial workflow completed: {acc}")))
        }
        "/parallel" => {
            let acc = workflow::parallel().unwrap();
            Response::builder()
                .body(Body::from(format!("parallel workflow completed: {acc}")))
        }
        _ => Response::builder()
            .status(StatusCode::NOT_FOUND)
            .body(Body::from("not found")),
    }
    .unwrap();
    Ok(response)
}
When a request comes in, the webhook calls the workflow function directly. Obelisk manages the full lifecycle — the HTTP response is sent after the workflow completes.
5. Configuration
The obelisk.toml file ties everything together:
api.listening_addr = "127.0.0.1:5005"   # gRPC API server
webui.listening_addr = "127.0.0.1:8080" # Web UI

[[activity_wasm]]
name = "activity_sleepy"
location = "${OBELISK_TOML_DIR}/target/wasm32-wasip2/release/activity_sleepy.wasm"
exec.lock_expiry.seconds = 10

[[workflow]]
name = "workflow_tutorial"
location = "${OBELISK_TOML_DIR}/target/wasm32-unknown-unknown/workflow/workflow_tutorial.wasm"

[[http_server]]
name = "external"
listening_addr = "0.0.0.0:9000"

[[webhook_endpoint]]
name = "webhook_tutorial"
location = "${OBELISK_TOML_DIR}/target/wasm32-wasip2/webhook/webhook_tutorial.wasm"
http_server = "external"
routes = ["/*"]
Each section declares a component and points to its compiled WASM file. ${OBELISK_TOML_DIR}
resolves to the directory containing the TOML file. See
Configuration for all options.
6. Build and Run
Build all three components:
(cd activity/activity-sleepy && cargo build --release --target wasm32-wasip2)
(cd workflow/workflow-tutorial && cargo build --profile workflow --target wasm32-unknown-unknown)
(cd webhook/webhook-tutorial && cargo build --profile webhook --target wasm32-wasip2)
Start the server:
obelisk server runThe Web UI is at http://localhost:8080. Trigger the serial workflow:
curl http://localhost:9000/serialYou should see workflow log messages in the server console:
INFO serial started
INFO Persistent sleep started
INFO Persistent sleep finished
INFO step(0)=0
INFO Persistent sleep started
 ...
INFO step(9)=9
INFO serial completed
Note that the activity's println! output (Step 0 started, etc.) does not appear in the
console — by default, stdout and stderr are forwarded to the database. Activities and webhooks are
WASIp2 components and can use println!, but the preferred approach for all component types is the
obelisk:log API (as used in the workflow above), which stores structured text entries rather than
byte streams.
You can retrieve all logs via the Web UI or the REST API.
First, list executions to get the execution ID. Use show_derived=true to include child executions
(workflows spawned by webhooks, activities spawned by workflows):
curl "http://localhost:5005/v1/executions?show_derived=true" -H 'Accept: application/json'Then fetch logs for a specific execution:
curl "http://localhost:5005/v1/executions/${EXECUTION_ID}/logs" -H 'Accept: application/json'This returns both log entries (from the obelisk:log API used in workflows) and stream entries
(stdout/stderr captured from activities). See
Logging for details on configuring what gets
forwarded where.
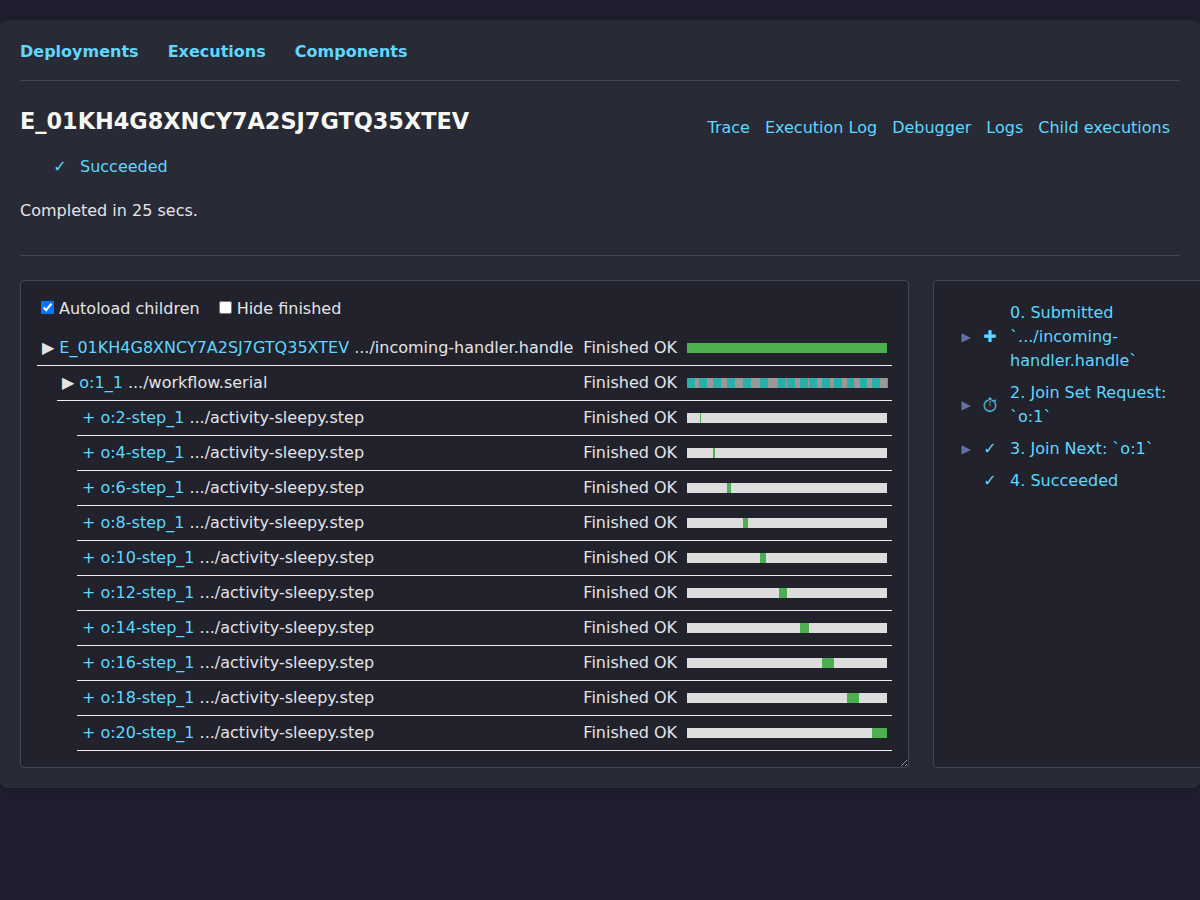
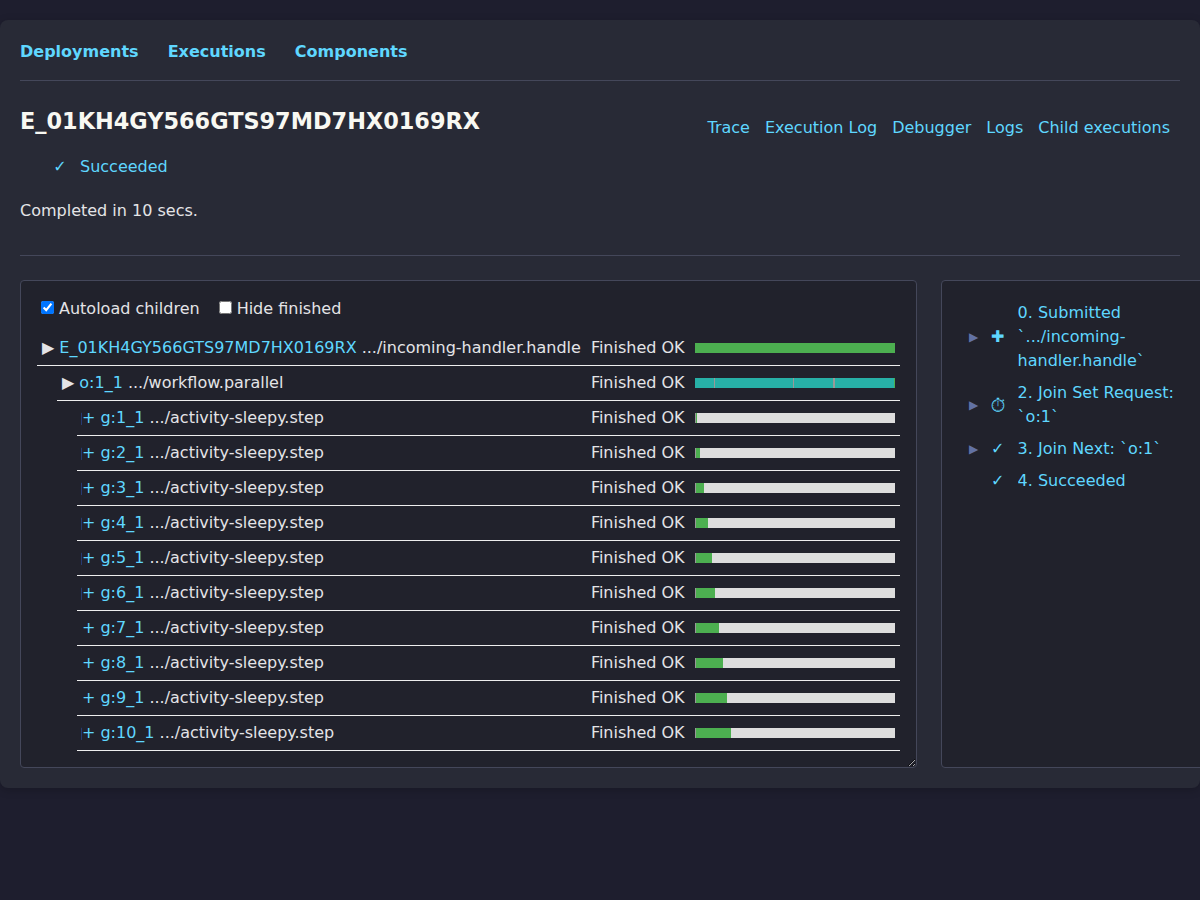
The Web UI at http://localhost:8080 provides a visual trace of every execution. Click on an execution and enable Autoload children to see the full hierarchy:
Serial workflow — steps run one at a time:
Trigger the parallel workflow:
curl http://localhost:9000/parallelAll ten steps start concurrently — you'll see them interleave in the logs.
Parallel workflow — all steps run concurrently:
7. See Crash Recovery in Action
Start the serial workflow, then kill the server mid-execution:
# In one terminal:
curl http://localhost:9000/serial

# In another terminal, while the workflow is running:
# Press Ctrl+C in the server terminal, or:
kill $(pgrep obelisk)
The curl request will fail — but the workflow state is safely persisted. Now restart the server:
obelisk server runObelisk automatically recovers the interrupted workflow from its last completed step. Already-completed activities are not re-executed — only the remaining work runs. The workflow finishes as if nothing happened.
This is durable execution: your workflows survive server crashes, restarts, and deployments without losing progress or duplicating work.
Next Steps
Now that you've seen Obelisk in action, here's where to go next:
-
Understand the concepts: Workflows, Activities, Webhook Endpoints, Join Sets, Extensions
-
Start a new project from a template:
cargo generate obeli-sk/obelisk-templates -
Explore a real-world example: The Stargazers demo uses a GitHub webhook, OpenAI, and a database to process GitHub star events with a multi-step workflow.
-
Learn the CLI: CLI reference covers submitting executions, inspecting state, and managing components.
-
Read the blog: Comparing Obelisk with DBOS walks through this same tutorial code in depth, comparing the approach with DBOS Java.